IP Conflict After WiFi Extender Setup: What to Do?
“After setting up a WiFi range extender by Setek, some devices can’t connect to the internet. It shows an IP conflict error.” Have you come across a similar error after the WiFi extender setup? Read this blog where in you will learn about the reason for the IP conflict along with the relevant solution. Bear in mind that the solutions are equally effective for any extender brand.
IP Conflict Due to WiFi Extender: Reason
So you have a Setek WiFi extender setup done. The WiFi extender gets its input the network from the main router. The devices can connect to the WiFi extender but not to the router or vice versa. While trying to connect to the router, you might receive an error saying IP conflict or unidentified network. That means the devices cannot connect to the router’s network. What could be the probable cause for this?
IP conflict has happened as your router and extender both have assigned the same IP address to two different devices.
Your main router (and not the WiFi extender) should be the one that assigns IP addresses to the devices on the network. Or your WiFi extender should assign an IP address in a different range that is different from the router’s. If you have two DHCP servers answering the IP requests, you are sure to come across IP conflict errors.
How to Fix IP Conflict Between WiFi Extender & Router?
To get the issue resolved, you should set your extender with a static IP address outside the DHCP pool. Apart from that, ensure that DHCP is turned off on the Setek WiFi extender. Let the main router handle the IP request. The only purpose of the extender is to extend the router’s signals. The next section will help you set static IP to the WiFi extender.
How to Set Static IP on WiFi Extender?
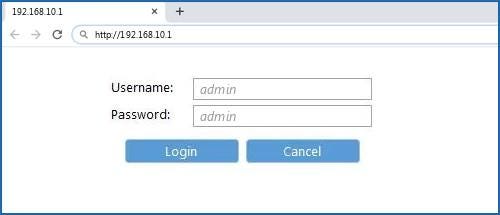
You ought to first log in to your WiFi extender’s web interface. For a Setek extender, use the IP address 192.168.10.1. The steps provided here are general. The same instructions can be used for any other WiFi extender model and brand.

- Join the extender’s WiFi on your phone or computer. The PC can also be connected with a LAN cable.
- Load up an internet browser next.
- In the address field, put in the IP address and press Enter to proceed.
- Log in with the help of the admin login details.
- After logging in, you will reach the admin dashboard.
- Click Setup > IP address Setup.
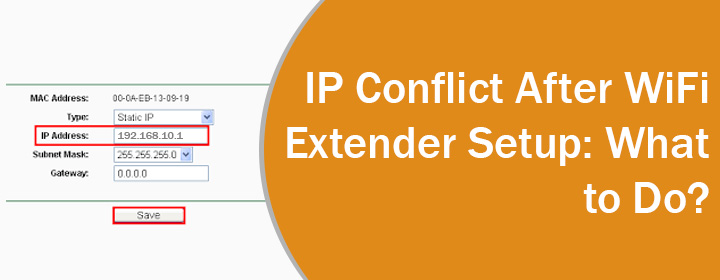
- Under Network Setup or Device’s IP Address, select Static IP.
- Type the static IP for the extender. It should be on the same subnet as the main router.
- Save the settings once done.
Final Words
If you are getting an IP conflict error while connecting to your router or WiFi extender, then using the solutions listed in this post will be helpful. Although by making the suggested changes, you should be able to get rid of the problem, in the event the issue persists, reset the extender to the default values. Set it up once again with the static IP address assigned to it and DHCP turned off.